Table of Contents
Want to learn how to build a home studio? We’re now living in 2021, and it has never been easier to acquire the most essential equipment and quickly get started creating professional productions.
To get started, you first need to learn about the most common components of a home recording studio. There are seven pieces of equipment that in my and many others’ opinion make the home studio complete, but you don’t necessarily need all of it. It is entirely up to you, depending on what your goals and your budget look like. The point of this article is to help you prioritize the right equipment!

The following equipment should be available in a home recording studio:
- Laptop or desktop computer with sufficient performance for recording, production and mixing
- Digital audio workstation (DAW software), for example Ableton, Pro Tools or Logic Pro
- Audio interface for recording microphone and instrument signals, and for connecting studio monitors or headphones
- Studio monitors or studio headphones with an accurate sound reproduction for production and mixing
- MIDI-keyboard for recording virtual instruments such as synthesizers, drums, etc.
- Microphone, either condenser or dynamic, for recording vocals and instruments
- Acoustic treatment to dampen your rooms acoustics for more accurate monitoring of sound
Don’t want to read the full article? Go check out the complete list of our recommended studio equipment at Thomann.
1. Computer

Unless you’re planning to get old school and record on tape, you will of course need a computer to power your music tools. But there are some things to consider that may not necessarily be obvious.
Performance and capacity
Do not skimp on processing power and disk space. Even if you do not think so now, your music projects can quickly become heavy and CPU hungry. Also make sure that your computer has a fairly quiet cooling system, otherwise the noise may interfere with both mixing and recording.
Desktop or laptop?
Think carefully about whether you should have a laptop or desktop computer for your home studio. The advantage of a laptop is of course that you can take your computer with you and work on your music no matter where you are, but keep in mind that a laptop generally means less performance for the money.
Long-term
Get yourself a computer that can keep up even as you and the technology evolves and become more advanced. The last thing you want when you are “in the zone” is to be limited by technology. I myself have been in that situation and it is extremely frustrating. Think not only about how you work with music today, but rather in a year or two. Will the computer live up to your requirements even then?
2. Digital Audio Workstation (DAW)
To be able to produce music on the computer, a music software (digital audio workstation, or DAW) is required.
If you are reading this article, chances are that you have already found a DAW to work in. If you are still unsure which one to go for, please try not to think too hard and do not get lost in the DAW jungle! It is much wiser to spend that time actually learning a software. There are so many to choose from, and all have varying functionality, pros and cons.
Common to almost all programs, however, is that they offer a free demo version you can download, so I recommend that you just jump into one and just give it a shot. Read the documentation and search for additional information on Google and Youtube.
Do not trust forum threads where people claim one DAW is better than the other, at least not if the person lacks arguments for it. Nine out of ten times it’s just about personal preference and workflow.
Below is a list of some of the most popular DAW’s on the market and what they cost. Several of these have different versions with varying prices, so I have selected the corresponding versions for each program. That is to say “Artist” is the equivalent of “Producer” or “Standard”.
Please note that some of the prices are for a digital copy (download), and some are for a physical copy.
| Name | Price (approx.) | Link |
| Ableton Live (Standard) | £211 (download) | Ableton Live at Thomann |
| Cubase (Artist) | £265 (physical) | Cubase (Official) |
| Bitwig Studio (Standard) | £222 (physical) | Bitwig at Thomann |
| FL Studio (Producer) | £135 (physical) | FL Studio at Thomann |
| Logic Pro X | £199 (download) | Logic Pro X (Official) |
| Pro Tools (Standard) | £459 (physical) | Pro Tools at Thomann |
| Studio One (Artist) | £75 (physical) | Studio One at Thomann |
3. Audio Interface
An external sound card (audio interface) is a priority and an essential part of the studio, especially if you plan to record for example vocals and instruments. And if you’re going to use studio monitors, an audio interface is absolutely necessary.
Most computer motherboards are equipped with an integrated sound card, and in some cases there is also a dedicated, internal audio interface. Unfortunately, these built-in interfaces rarely support the connection of instruments, microphones or studio monitors. Even if it’s good enough for most people, it’s not what a music producer needs.
What you want is an external audio interface with one or more XLR / TRS inputs for microphone and instruments, and TRS outputs for studio monitors and / or headphones. The external audio interface is usually connected with USB or firewire and is plug and play so you can get started immediately.
In the settings of your DAW, select the ASIO of the audio interface as the audio input device. This allows your external sound card to communicate directly with the software and give you minimal latency.
4. Studio Monitoring
Studio monitors
Although it is possible to produce and mix music on any sound system, there is a strong argument for using equipment intended for the studio.
Loudspeakers for audio production, so-called studio monitors, are unlike other sound systems designed to deliver an accurate or “honest” sound. This means that the sound image is balanced and uncolored, without distinguishing the bass, midrange or treble. The purpose of this is to be able to hear how all the instruments really sound and how they sit in the mix.
When it comes to everyday sound systems such as a bluetooth speaker, this is not necessary, and therefore the frequency curve can instead be adapted for a more pleasant sound experience. Mixing is about making a song sound good on all sound systems, and if you do not mix with an uncolored sound, you have to compensate for the inaccurate frequencies. Not the easiest of tasks!
It’s great if you can invest in a pair of studio monitors in the price range of £250-£500, but preferably higher if possible. Generally with studio monitoring, you get better quality and a more accurate sound the higher up in the price ranges you climb.
Also, make sure to acoustically treat your home studio to dampen the room’s reflections that also contribute to a colored sound. That’ll be a later topic.
Studio headphones
If you currently have a limited budget to spend on audio, it may be beneficial to invest in a pair of headphones instead. There are studio headphones under £200 that sound fantastic and have an accurate sound. One of the disadvantages of headphones, however, is that you can unfortunately suffer from “ear fatigue”, which simply means your ears get tired from prolonged listening. It can also be difficult to judge the dynamics in the same way as with a pair of studio monitors, which makes mixing somewhat difficult.
The advantage of producing and mixing in headphones is of course that you can do it undisturbed and without disturbing others in your surrounding. Mixing in headphones does the job, but our recommendation is to get a pair of studio monitors when you can afford it.
5. MIDI keyboard
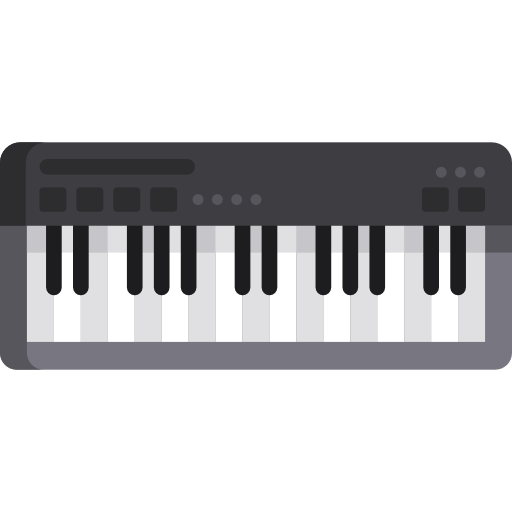
MIDI keyboard is another important tool in the music producer’s arsenal. It comes in many different sizes and with hundreds of different features. Many are equipped with sliders and knobs that can be connected to parameters in the DAW, and some have pads that make it easy to record and program sequences of for example sampled drums.
Even if you are not the most talented piano player, you will make good use of a MIDI keyboard. You can quickly and easily test your own synth sounds, ideas for melodies and record small pieces that you can refine and quantize afterwards.
Most DAW’s are equipped with a virtual MIDI that can be played on the computer keyboard, but this is often cumbersome and conflicts with other useful shortcuts that you’re likely to use.
A MIDI keyboard is an important investment for music producers, whether it is a hobby or they do it professionally. If you lack the space or budget for a large one, at least get a compact one with 25 keys or so.
6. Microphone

When you think of a music studio, one of the first things that come to mind is probably a microphone. I mean, imagine a world without it! Digital music wouldn’t exist, and big concerts probably wouldn’t be a thing. The microphone is the mother of modern music, and even the simplest of home studios should have one.
“But I’m not a singer”, you might say. The microphone can do so much more than just vocals. It allows you to record instruments, guitar amps, the sounds in your surroundings or just you drumming on pot lids with kitchen utensils. The microphone opens up your world to an infinite number of creative possibilities.
There are many different types of microphones, but the two most common are condenser microphones and dynamic microphones.
In order for you to know which type suits you best, here is some information about the two:
Condenser microphones
This type of microphone is the most common when recording vocals and acoustic instruments. It connects to your audio interface with an XLR cable.
The condenser microphone is very sensitive and captures all sounds in its surroundings. This is the reason why it is important to have a quiet, acoustically treated recording environment.
Due to the sensitivity, plosives (such as P, and T-sounds) are also captured and therefore a pop filter is almost always used in front of the condenser microphone. The pop filter ensures that the air from the plosives that otherwise reaches the microphone. Remember to buy a pop filter if it is not included with the microphone.
The vast majority of condenser microphones connected with XLR require power supply from the audio interface, so-called phantom power, to work. There are also models that connect via USB, but such microphones don’t use the audio interface and should therefore be avoided by music producers. If you record music, get a microphone that connects with XLR!
Dynamic microphones
Unlike the condenser microphone, the dynamic microphone only picks up sound in its proximity. You usually see dynamic microphones in live contexts, but sometimes also in music studios where they are used for, among other things, recording guitar amps, drums and vocals. When recording podcasts, voice-overs and radio, a dynamic microphone is optimal.
7. Acoustic Treatment
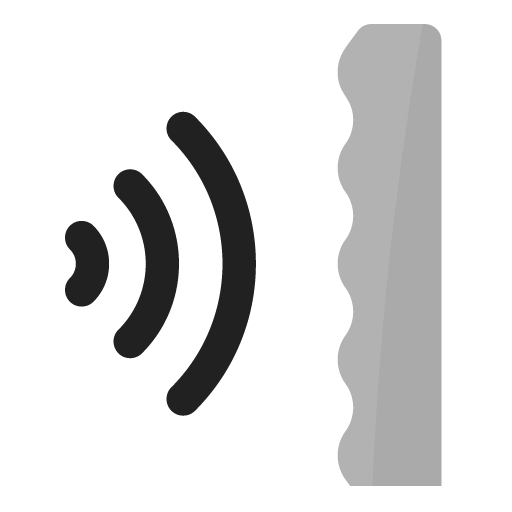
All rooms have a certain level of sound reflection, which can cause problems when recording and mixing. Put simply, this means sound waves that bounce on the walls make certain frequency ranges appear more pronounced than they really are. A very square room also has a tendency to make bass frequencies sound “messy” and undefined. As previously mentioned, you want as accurate sound as possible and therefore this is not ideal in a studio environment.
What you need to do is buy or build your own acoustic panels (sound absorbers) and bass traps which you then place on problematic spots in the room. When the sound waves reach the acoustically treated surfaces, they are absorbed, and what you hear instead is the true sound from the studio monitors, or at least as close as you can get. The sound of the room no longer mixes with the sound, and the monitoring becomes much easier.
When it comes to recording, acoustic treatment is mainly about getting rid of the most problematic reflections, not that the room sound should die away completely. You want to get a little sense of space in a recording, otherwise it can remain lifeless and “boxy” even after the effects are applied.
When it comes to mixing and mastering, however, it is advantageous to have as quiet a room as possible. In a home studio, the recording environment is in many cases the same as the mixing environment, and it is therefore necessary to find a good acoustic balance.
Which surfaces need to be treated and how much depends on factors such as:
- Location of the studio monitors
- What materials walls, ceilings and floors consist of
- Dimensions and shape of the room
- What furniture is in the room, its materials and where they are located
Acoustic treatment is a debated topic that may seem confusing and difficult to understand, but it is actually quite simple when you get some knowledge about how sound works and spreads throughout a space.
Other equipment
When you are busy thinking about the interesting and fun equipment, it is easy to miss the details. Do not forget that you also need furniture, cables, adapters, power supplies, etc.
Imagine bringing home your brand new studio monitors just to realize that you missed out on buying the necessary cables. Bummer!
Here are the you should keep in mind:
- Extension cords / power supply , preferably with a switch. Computer, screen, studio monitors, lights, etc. require power
- Make sure you have a large enough desk . Computer and audio equipment take up space, and the studio monitors require a certain distance from each other
- Floor stand for your microphone and possibly for studio monitors if you wish to have them standing on the floor instead of on the desk
- A comfortable computer chair is not to be underestimated. It’s easy to spend many hours in the studio
- Cables to connect all your gear up:
- Two XLRs (female) for TRS (male) for studio monitors
- One XLR (female / male) per microphone
- A TRS female extension (TRS female / male) for when recording and monitoring with headphones
Are you on a budget?
A complete home studio is expensive, and many have to build it gradually. Of course, this does not mean that music creation has to wait until the studio is finished. Make sure you prioritize right and only get the most important equipment at the start of your career.
After all, it is possible to produce music with just one computer, a free music software, a cheap computer sound system or even a pair of mobile headphones. It’s not optimal, but something is better than nothing at all.
Assuming you currently do not own any equipment at all, not even a computer, here is my priority list of audio equipment you should get first:
- Computer with all necessary accessories
- DAW software
- Studio headphones
- Audio interface
- Studio monitors
- Condenser microphone or MIDI keyboard depending on what you require
- Acoustic treatment
Guide: What do you need in a home recording studio?
Guide: What do you need in a home recording studio?
